


Mother’s Day. Such a well deserved day but usually forgotten by the ones who deserve it most. I can say that I am absolutely guilty of pulling the “Oh, I don’t want anything” card when it comes to Mother’s Day. I seem to always find something better money can be spent on, and time with my boys is all that really matters. But what I’m also guilty of is down right spoiling all the mommas in my life. I absolutely love it! In my opinion, if most moms are like me and don’t see the need for any special treatment, it truly means that much more to be surprised with a little unexpected happy.

In our family, we have a lot of really special ladies in our lives. When it comes to gifting so many people, it needs to fit into our budget, and having 10 or more arrangements of flowers delivered is exactly the opposite of easy on the budget. So we go DIY, all the way! To me, a DIY gift puts value on something no dollar can touch. Just the sentiment behind knowing something had that extra time and thought put into it is a winner in my book any day. Oh, and those tiny little hands….knowing that those tiny little hands helped put together something sweet tops it all!
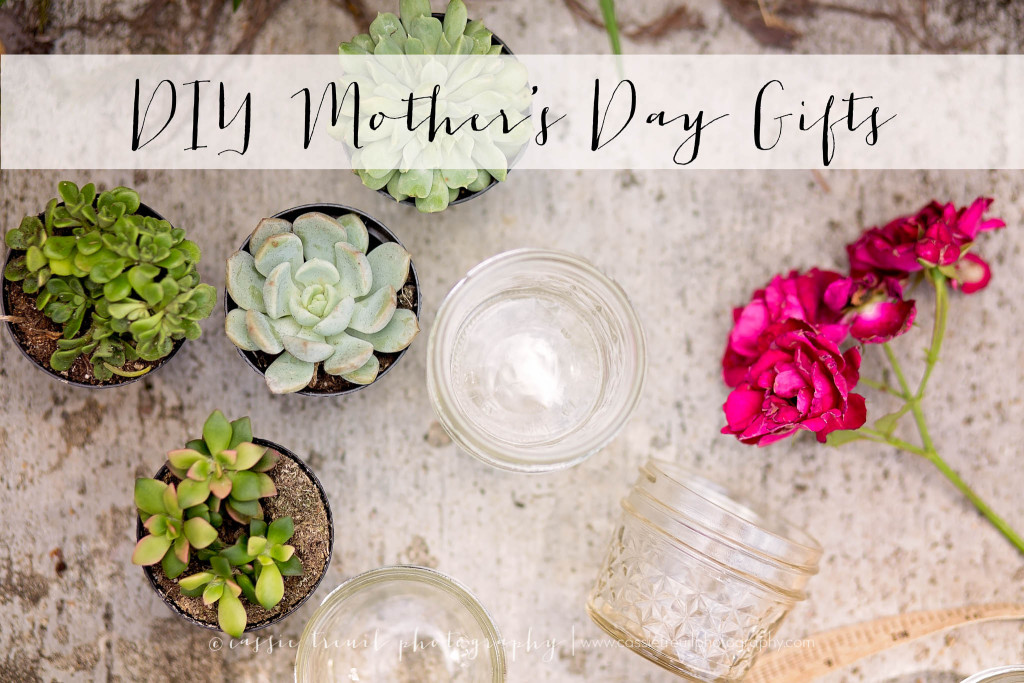
With all of that being said, I’m so excited to share with y’all some of our favorite DIY gifts for Mother’s Day!
*Note: These ideas are also wonderful for Teacher Appreciation!
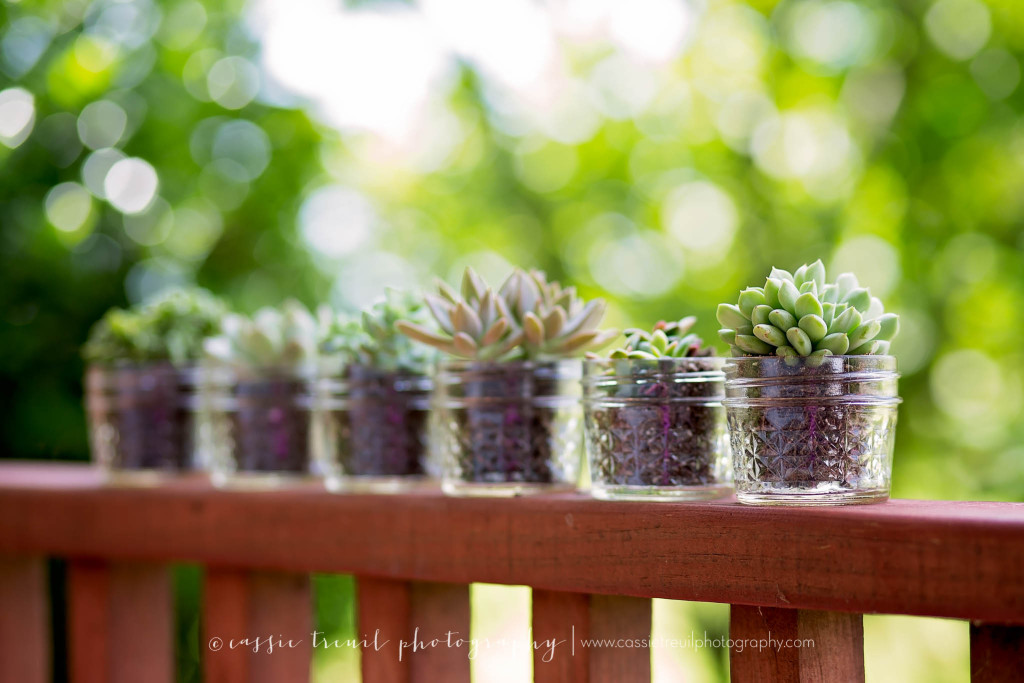
Mini Succulents in Mason Jars
Succulents and Mason Jars….who could resist? I know this girl can’t! I love that they are super easy for even the youngest of kiddos to help DIY and are thrown together in a matter of seconds….YEP! Just a couple of items and a smidge of time to whip the sweet little succulents up. Making them on the top of my last minute gift list!
Items Needed:
– A variety of small succulents purchased from your local nursery. We’ve purchased lots of succulents, and I know for sure that both Lowe’s and Home Depot carry these in a variety of sizes.
– teeny tiny mason jars
– decorative ribbon (optional)
How to Make:
Remember when I said these took only seconds to DIY…well here ya go! Pop the succulent out of its pot that you purchased it in and pop it into your mason jar! SO EASY! The great thing about these are the fact those sweet little mason jars are almost identical in size to the pots the plants are sold in. Top it off with a little water and add some fun ribbon if you’d like or a sweet hang tag and voila! You’ve got yourself a super easy, affordable DIY gift that packs a punch. These make my heart so happy!

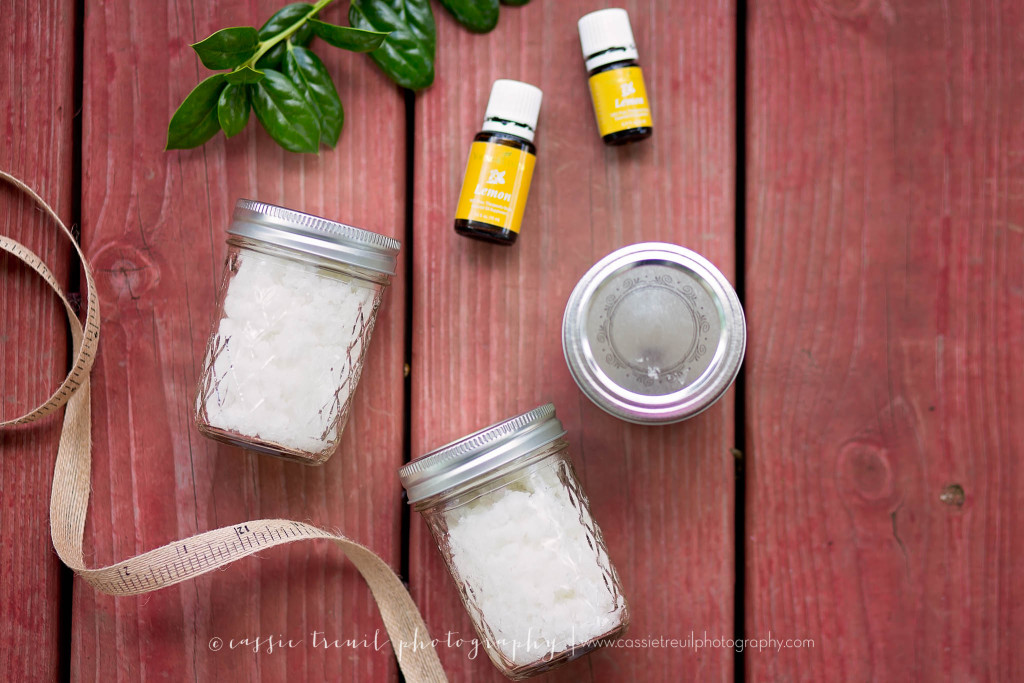
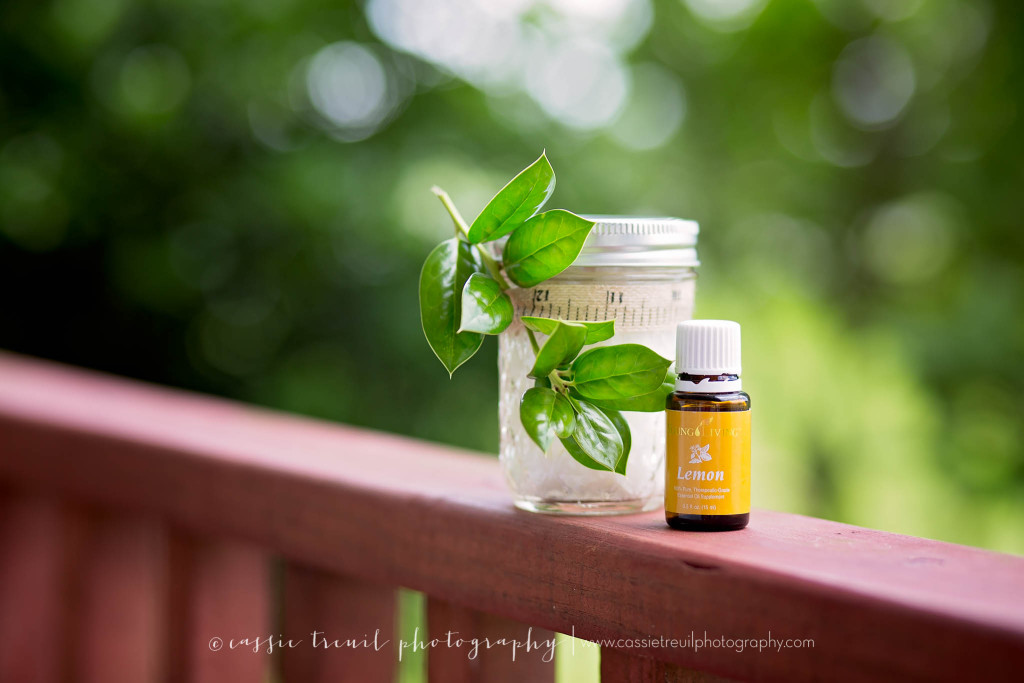
Lemon Sugar Hand Scrub
…because what momma doesn’t need something fresh and pretty by her kitchen sink?! While these are a little more complex because of their ingredients, they are still one of our faves! The boys loved mixing everything together and me…I loved adding some super fun ribbon and fresh foliage from the yard for that added touch.
Items Needed:
– 2 1/2 cups of sugar
– 1/2 cups of fractionated coconut oil
– 2 tablespoons of lemon juice
– 10 drops of lemon essential oil
– mason jars in any size you’d like
– decorative ribbon (optional)
How to Make:
Mix all ingredients above and fill your mason jars up! The good thing about this is that you’ll have a good bit made, and it’s so easy to just add more of each ingredient if you decide you need more. Finish these off with something fun like ribbon or even a sticker for the lid of the mason jar! I promise you, anyone is sure to love these little lemon lovelies.
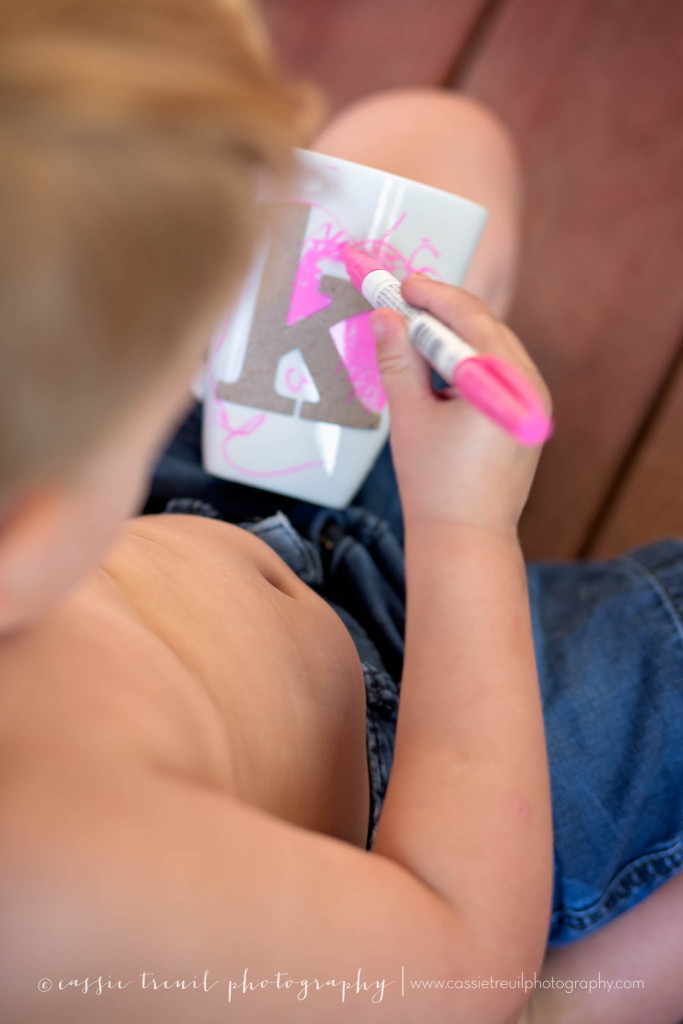
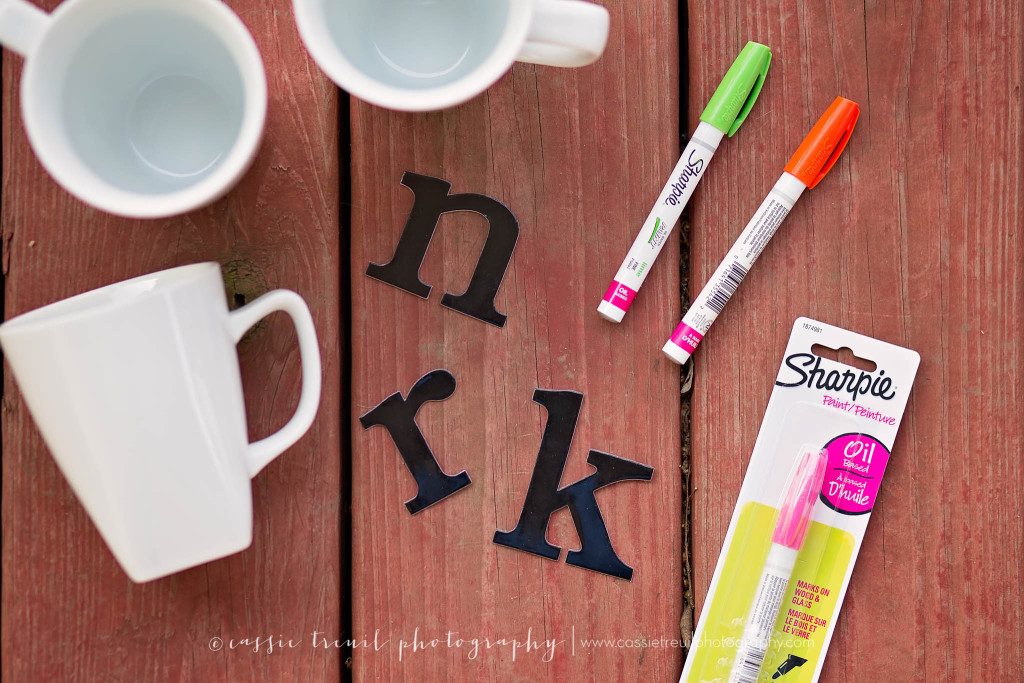
Hand Drawn Initial Mugs
I can’t say that any of these DIY gifts are my all-time favorite BUT this one is probably the closest to breaking the three way tie! I absolutely love the personal touch these have. To me a DIY gift, especially from a child is so special when they can add in something from them. These do just that! An initial to personalize it for the person receiving it and artwork from the sweet pea gifting it…ahhh my momma heart just melts into a puddle at the thought of these! And they are fairly easy!

Items Needed:
– white inexpensive coffee mug
– oil based Sharpies (Oil based is the key here! Don’t skimp on this part, your mug is way more likely to hold its artwork for years to come if using the oil based Sharpies)
– letter stickers
How to Make:
Prep your mug by washing and drying it. Next, place your letter sticker(s) where you’d like them. Give the kids their Sharpies (I’d also throw an old large shirt over their clothes in case of mess) and let them go to town. The main thing is making sure there is enough colore around the immediate edges of the stickers so that once peeled off, you can see what letter was meant to show. Kade got annoyed with that little detail so I helped him get it done. Once artwork is complete and dry and the stickers are peeled off, put your mug in the oven and bake at 350 for 30 minutes.

So there y’all go! All of my DIY faves for Mother’s Day! From all of us at Red Stick Moms, Happy Mother’s Day!


