


I am not crafty. My degree is in Finance and Insurance (read: boring stuff). I don’t do creative. So when I told my husband I was going to restore an old kids’ table I found on Craigslist, he probably wondered what I had been mixing with my lemonade. Luckily, it was fairly quick and painless, and I’m probably way too proud of myself. Here is a step by step of my toddler table transformation:
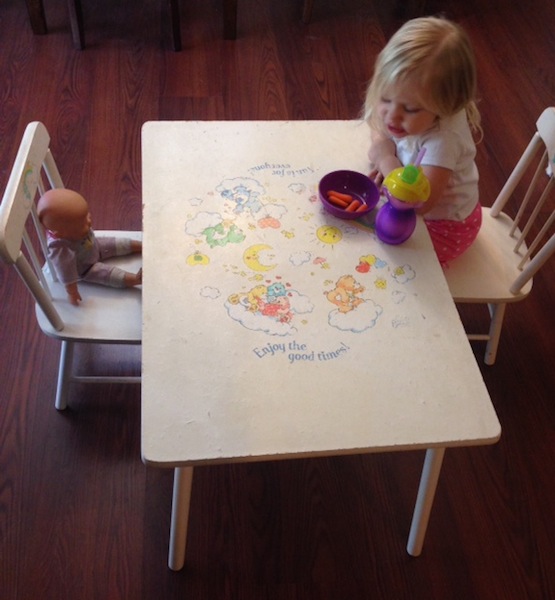
1. Buy super awesome Care Bears table on Craigslist for $20. I’d been looking for a little table for Etta Mae for awhile, and I couldn’t pass this one up. To be honest, I was a little partial to the Care Bears (Etta Mae kept talking about the rainbows), but they weren’t in great condition.

2. Give said table a good scrubbing. Sorry I didn’t take a picture of this step, but I’m sure you get the idea.
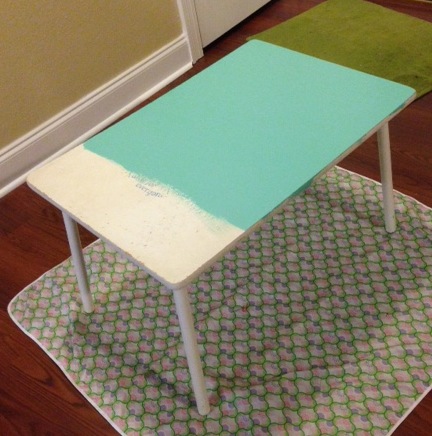
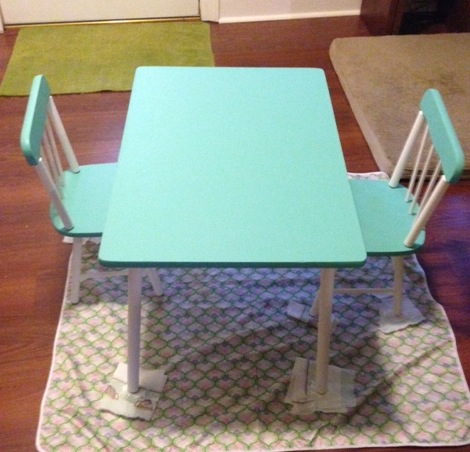
3. Break out the paint. I decided to go with chalk paint (not to be confused with chalkboard paint) because it covers literally everything with virtually no prep work. I had purchased a jar for another project that never happened, so it seemed as good a time as any. There are several companies that make chalk paint (and several DIY recipes), and I went with a local work at home mom company called The Painted Pretties. Their products can be found in several local retailers. The color is Ocean Breeze, a perfect blue-green. I used white for the legs and spindles for contrast.
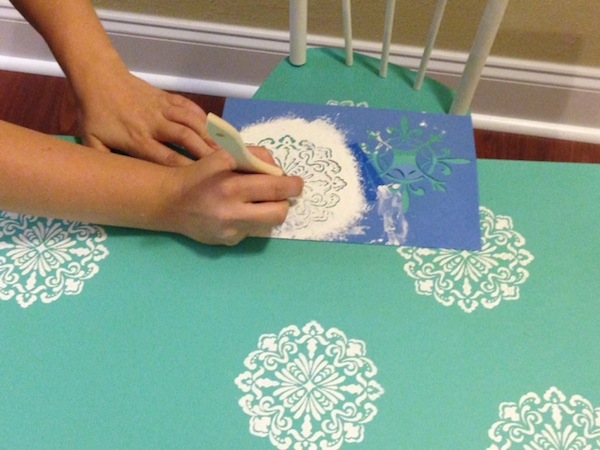
4. Make it pretty. I knew I wanted to use some kind of stencil, but I had no real idea of what it should be. I hit up Hobby Lobby and picked a couple that I thought were cute. And of course, I used a 40% off mobile coupon. I decided to go with random stenciling instead of a pattern, and I didn’t preplan at all. I drybrushed these to give them a little texture.
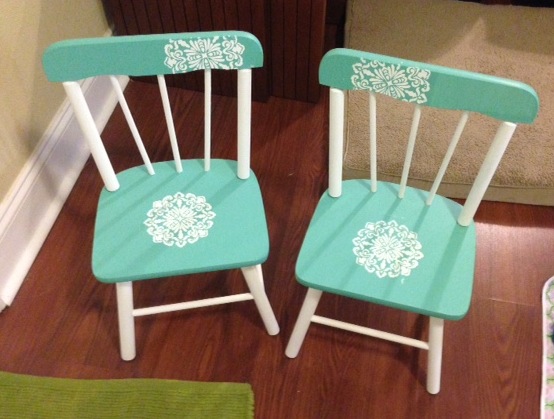
5. Wax on, wax off. Wax is an optional finishing method of sealing your paint job. Most wax companies offer both clear and dark wax to give different looks. I used the clear version. I was a little nervous as I had heard horror stories about the difficulty of waxing after chalk painting. The instructions said to just apply with a lint free cloth. It went on like butter and took no time at all. So, I’m not sure if I did it right, but it looks good! Do be aware that the wax is super stinky, so you want to make sure you’re in a well ventilated area.

6. Sit back and admire your work over a glass of wine (not pictured).
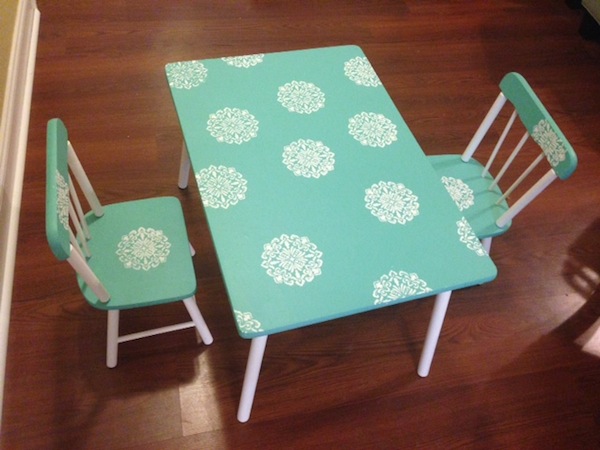
Etta Mae is so excited about her new table! She tells me that the stenciled designs are the sun, and she loves to color and snack at a table that is just her size. Now I’m just trying to figure out what my next project will be!


